what happens if i lose my internet connection to team viewer
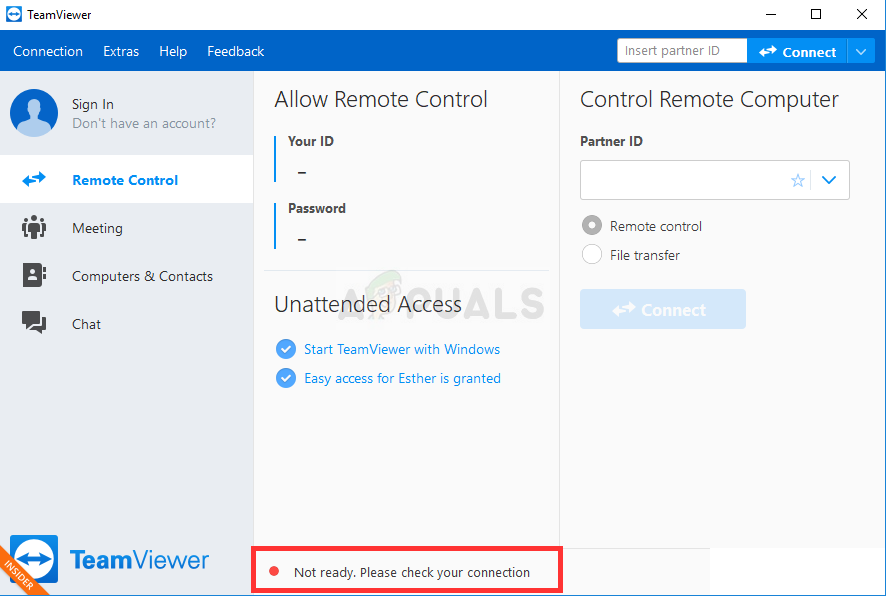
TeamViewer is a useful program for video chats and remote control and it'southward quite a pop choice among gamers and remote IT help. All the same, many users have reported that they are simply not able to connect. They run into the problematic fault bulletin at the bottom of their screen, adjacent to cerise light.
There are quite a few methods yous can use to resolve the problem and we suggest yous check them out below. They are usually quite easy to perform and they tin can resolve your trouble in an instant!
What Causes the TeamViewer "Non Set Check Your Connection" Fault on Windows?
This particular trouble has many different causes and pinpointing the correct i may be crucial if yous don't want to try out every method on the listing. This will guide you to the solution faster and that is why we decided to create the list of all possible causes located below!
- Incorrect settings in the 'hosts' file – The 'hosts' file contains important information about apps connecting to the Net and it's possible that the entry for TeamViewer got corrupted. Deleting its entry volition crusade Windows to re-create information technology so try that to resolve the problem.
- Antivirus or firewall problems – If TeamViewer's access to the Internet is prevented past the firewall or antivirus yous have running, make sure you try making an exception for its master executable file.
- DNS and Winsock issues – DNS addresses tin can be inverse and Winsock can be reset. For many users, this is all it took to resolve the problem and then make sure you lot effort information technology out!
- IPv6 connectivity – TeamViewer only won't work on IPv6 sometimes so brand sure yous consider disabling it for the sake of resolving this problem. It won't injure and it may bring TeamViewer back!
- TeamViewer's new interface – The user interface is not something which should be related to connectivity problems merely it was certainly the instance for several TeamViewer users. Reverting to the quondam interface managed to resolve the trouble for them.
Solution 1: Remove TeamViewer from the Hosts File
It's highly probable that the TeamViewer entry in the 'hosts' file on your computer has been corrupted. It might bear witness addresses and data which is completely wrong and we advise you delete its entry. Once yous reopen information technology, the entry will be recreated and the problem would hopefully terminate to announced!
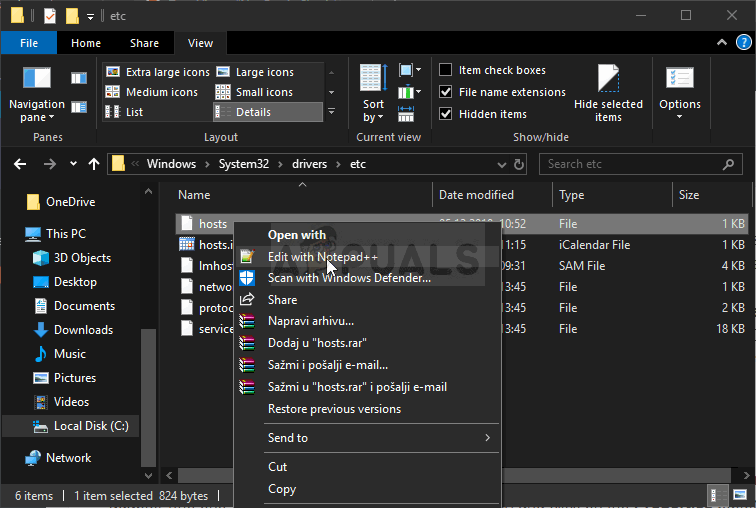
- Navigate to the location C >> Windows >> System32 >> Drivers >> Etc past navigating to information technology later opening the File Explorer. First, click This PC or My Calculator from the left side pane to locate and open your Local Disk C.
- If you are unable to see the Windows folder, you may need to turn on the choice which enables y'all to see hidden files and folders. Click the "View" tab in File Explorer'due south peak menu and click the "Hidden items" checkbox in the Bear witness/hibernate File Explorer will bear witness the hidden files and will think this setting until you lot change information technology once more.

- Locate the hosts file in the Etc binder, right-click on information technology, and cull to Open with Notepad. Use the Ctrl + F key combination and make certain you enter 'teamviewer' in the Find what box before clicking the Find adjacent
- Locate the TeamViewer section in the file. It should start with "#Teamviewer" and make sure you select everything that belongs to information technology, right-click the selection, and choose the Delete push from the context menu.
- Click File >> Save to save the changes or utilize the Ctrl + Southward fundamental combination. Exit Notepad and restart your computer. Check to run across if the problem persists regarding the TeamViewer "Not ready. Check your connection" error message!
Solution two: Change Your DNS Address
Users have said that they were able to resolve the upshot simply by changing the DNS provided by your ISP (Internet service provider) and starting to use a unlike one. It can exist a DNS of a computer where the effect doesn't appear merely many users merely used Google's DNS to resolve the trouble. Follow the steps below to change the DNS address on your reckoner!
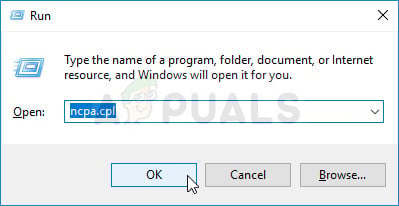
- Use the Windows + R key combination which should open the Run utility box where you lot should type 'ncpa.cpl' in the text box and click OK to open the Internet Connection Settings entry in Control Panel.
- The same thing tin can be done just by manually opening the Control Panel. Switch the View by option at the acme right department of the window to Category and click on Network and Internet at the top. Click the Network and Sharing Middle button to open it before managing to locate the Alter adapter settings push button at the left carte and click on information technology.
Edit the Hosts file - Now that the Net Connexion screen is open up using whatsoever method above, double-click your active network adapter (the one you lot are using to connect to the Internet) and click on the Properties button below if you lot have admin permissions for the current user account.
- Locate the Internet Protocol Version iv (TCP/IPv4) item on the list. Click on it to select it and click the Properties button below.

Opening IPv4 Backdrop - Stay in the Full general tab and change the radio button in the Properties window to "Use the post-obit DNS server addresses" if information technology was set to the other option.
- Either fashion, set the Preferred DNS server to be 8.8.8.8 and the Alternate DNS server to exist 8.8.iv.4.

Setting the DNS accost - Proceed the "Validate settings upon exit" option checked and click OK to utilise the changes immediately. Check to see if the TeamViewer "Not ready. Check your connection" fault bulletin still appears on your computer!
Solution 3: Reset Winsock
"netsh Winsock reset" is a helpful command that you can employ in Command Prompt to reset Winsock Itemize back to default setting or its clean state. You can try this method if you are experiencing the inability to connect in TeamViewer.
- Search for "Control Prompt" by typing information technology either correct in the Start menu or past pressing the search button right side by side to it. Right-click the outset entry which will pop up as a search result and select the "Run as administrator" context menu entry.
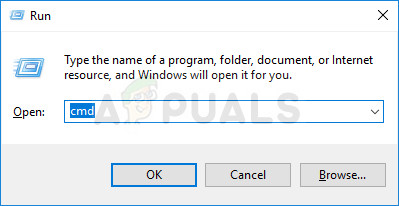
- Additionally, you can also use the Windows Logo Key + R key combination to bring up the Run dialog box. Type in "cmd" in the dialog box which appears and utilise the Ctrl + Shift + Enter key combination to run Control Prompt using administrator privileges.
Running Command Prompt - Type in the following commands in the window and make sure you press Enter after typing each one. Wait for the "Winsock reset completed successfully" message or something similar to know that the method has worked and yous haven't made any mistakes while typing. Check to see if the result persists.
netsh winsock reset netsh int ip reset

Solution iv: Don't Use the New User Interface
User interface shouldn't be in whatever mode continued to TeamViewer's internet connexion simply, weirdly enough, many users have reported that they were able to resolve this issue merely by reverting to the program'south old design. This can be done in TeamViewer's settings and then make sure you follow the steps below and try to resolve this connectivity upshot.
- Open TeamViewer by double-clicking its icon from Desktop or by searching for it after opening the Start carte and left-clicking the top effect.
- From the habitation screen, click the Extras button from the menu bar and cull the Options entry from the list which volition appear.

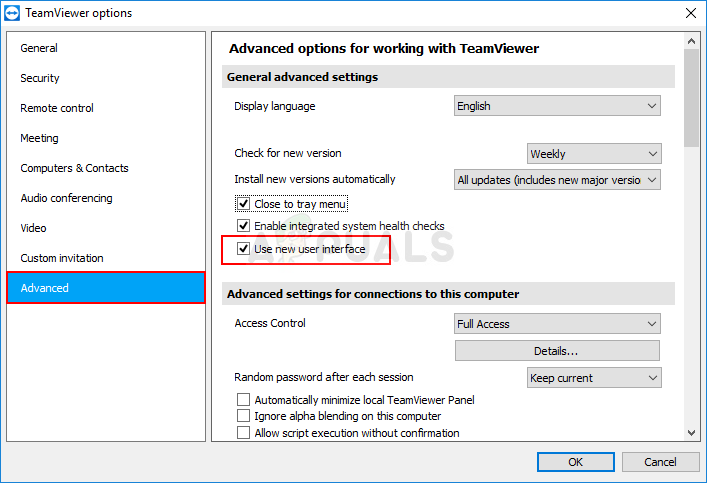
TeamViewer options - Navigate to the Advanced tab in TeamViewer options from the left-side navigation menu and check nether General Avant-garde Settings for the "Apply new user interface" option. Make sure you uncheck the box next to information technology before confirming the changes you have made.
Uncheck this box - Reopen TeamViewer and check to encounter if the TeamViewer "Not set. Check your connectedness" error bulletin yet appears on your computer!
Solution 5: Add an Exception for the Teamviewer_Service.exe File
Sometimes antivirus tools fail to recognize the program'southward efforts to connect to the Internet as harmless and TeamViewer'due south features are often blocked by it. To prove to the antivirus that the program is harmless, you volition take to add information technology to its Exceptions/Exclusions listing!
- Open the antivirus user interface by double-clicking on its icon at the arrangement tray (correct part of the taskbar at the bottom of the window) or past searching for it in the Outset menu.
- The Exceptions or Exclusions setting is located in different spots apropos different antivirus tools. It can oft be found simply without much hassle but here are some quick guides on how to observe it in the most popular antivirus tools:
Kaspersky Internet Security: Home >> Settings >> Boosted >> Threats and Exclusions >> Exclusions >> Specify Trusted Applications >> Add.

Kaspersky Exclusions AVG: Domicile >> Settings >> Components >> Web Shield >> Exceptions.

AVG Exceptions -
Avast : Home >> Settings >> General >> Exclusions - Yous volition need to add the Teamviewer_Service.exe executable in the box which will appear prompting yous to navigate to the folder. It should exist in the same folder where you lot decided to install TeamViewer in. Past default, it's:
C:\Programme Files (x86)\TeamViewer
- Check to meet if you are now able to use TeamViewer without receiving the problematic mistake message. If it nonetheless won't work, try restarting your reckoner and try again. The last step would be to uninstall the antivirus and effort a different one if the problem persists.
Solution 6: Permit information technology in Windows Defender Firewall
For TeamViewer'south features to work properly, the app needs to have uninterrupted admission to the Internet and its servers to work properly. Windows Defender Firewall is frequently to blame in such cases and we recommend you lot make an exception for the Teamviewer_Service.exe executable within the Windows Defender Firewall!
- Open up Control Panel by searching for the utility in the Start button or past clicking the Search push button or the Cortana button at the left part of your taskbar (bottom left part of your screen).
- After Command Panel opens, change the view to Large or Modest icons and navigate to the lesser to open the Windows Defender Firewall pick.

Opening Windows Defender Firewall - Click on Windows Defender Firewall and click on the Permit an app or characteristic through Windows Firewall option from the left side list of options. A list of installed apps should open. Click the Change settings push at the summit of the screen and provide ambassador permissions. Effort locating the executable inside. If it's not there, click the Allow another app button below.

Assuasive an app through - Navigate to where you lot installed TeamViewer (C:\Program Files (x86)\TeamViewer by default) and choose the Teamviewer_Service.exe file.
- Afterwards locating information technology, click the Network types button at the superlative and brand sure you cheque the boxes next to both Private and Public entries earlier clicking OK >> Add together.

Network types - Click OK and restart your calculator before checking whether the TeamViewer "Not ready. Cheque your connectedness" error message all the same appears on your computer.
Solution 7: Disable IPv6
Disabling Internet Protocol version 6 connectivity on your computer managed to resolve the problem for many users and information technology's an easy way to resolve the problem. This makes this method worthy and y'all shouldn't skip information technology during your troubleshooting process.
- Utilise the Windows + R key combo which should immediately open the Run dialog box where y'all should type 'ncpa.cpl' in the bar and click OK to open the Internet Connection settings particular in Control Panel.
- The same process tin also exist done by manually opening the Command Console. Switch the View past setting at the elevation correct section of the window to Category and click on Network and Internet at the meridian. Click the Network and Sharing eye push button to open up it. Try to locate the Alter adapter settings button at the left menu and click on it.
Run this command - When the Internet Connection window opens, double-click on your active Network Adapter.
- And then click Properties and locate the Net Protocol Version half-dozen entry on the list. Disable the checkbox next to this entry and click OK. Restart your calculator to confirm the changes and check to see if the problem persists.

Solution 8: Restart the TeamViewer Service
Stopping the TeamViewer service from running will effectively restart the whole procedure and many users take reported that it only took them a few minutes to get TeamViewer to work again. Before starting, make certain you have closed TeamViewer completely.
- Open the Run utility by using the Windows Central + R key combination on your keyboard (printing these keys at the same time. Type "services.msc" in the newly opened box without the quotation marks and click OK to open up the Services tool.

Running Services - The culling manner is to open the Control Panel by locating it in the Start menu. You can also search for information technology using the Start menu'south search button.
- Later on the Control Console window opens, change the "View past" selection at the top correct part of the window to "Large Icons" and roll down until you locate the Administrative Tools entry. Click on it and locate the Services shortcut at the bottom. Click on information technology to open up it as well.

Opening Services in Control Panel - Locate the TeamViewer Service on the list, right-click on information technology and select Properties from the context carte du jour which appears.
- If the service is started (you can check that just next to the Service condition message), you should terminate information technology for at present by clicking the Finish button in the middle of the window. If it is stopped, leave it stopped until nosotros keep.

TeamViewer service backdrop - Make sure that the option nether the Startup type carte du jour in the service's properties window is fix to Automatic earlier yous proceed with other steps. Confirm whatsoever dialogue boxes which may appear when changing the startup type. Click on the First push button in the centre of the window before exiting.
Solution 9: Reinstall TeamViewer
If all methods above neglect to work, reinstalling TeamViewer is the last method which can help you resolve the trouble on your computer. It should be fast and painless if you lot follow all the steps properly! You volition also install the latest version which contains the patch to the specific issue you are having!
- Click the Starting time menu and open Control Console past searching for it merely by typing with the Start card window open. Alternatively, y'all can click the cog icon in the lower-left role of the Start bill of fare to open the Settings app if you are using Windows 10.

Opening Settings in Start menu - In Control Panel, select the View as: Category choice at the pinnacle right corner of the Control Panel window and click on Uninstall a Program under the Programs section.
- If you are using the Settings app, clicking on Apps should immediately open a list of all installed programs on your PC then wait for a while for it to load
- Locate TeamViewer in Command Console or Settings and click on Uninstall/Repair. Follow any instructions which announced afterward to uninstall it completely.

Uninstalling TeamViewer - Download the latest version of TeamViewer by visiting this link. Download its setup file, run information technology from the Downloads folder, follow the instructions on screen, and check to see if the problem persists afterward reinstalling TeamViewer!
![]()
Source: https://appuals.com/how-to-fix-the-teamviewer-not-ready-check-your-connection-error-on-windows/